Rendering 3D Models in the Browser
Overview
I feel like a lot of us have games and books that have sat on the shelf since we were younger. Even though they aren't used anymore we have them on display collecting dust and slowly decaying simply for nostalgia purposes. With some games I enjoy getting a modern refresh I had the idea of turning some of my old computer game boxes into 3D models so they can live on for time to come. In this article we'll explore the different ways to create the models, along with some of the options available when it comes to displaying them in a web browser.
3D Model Basics
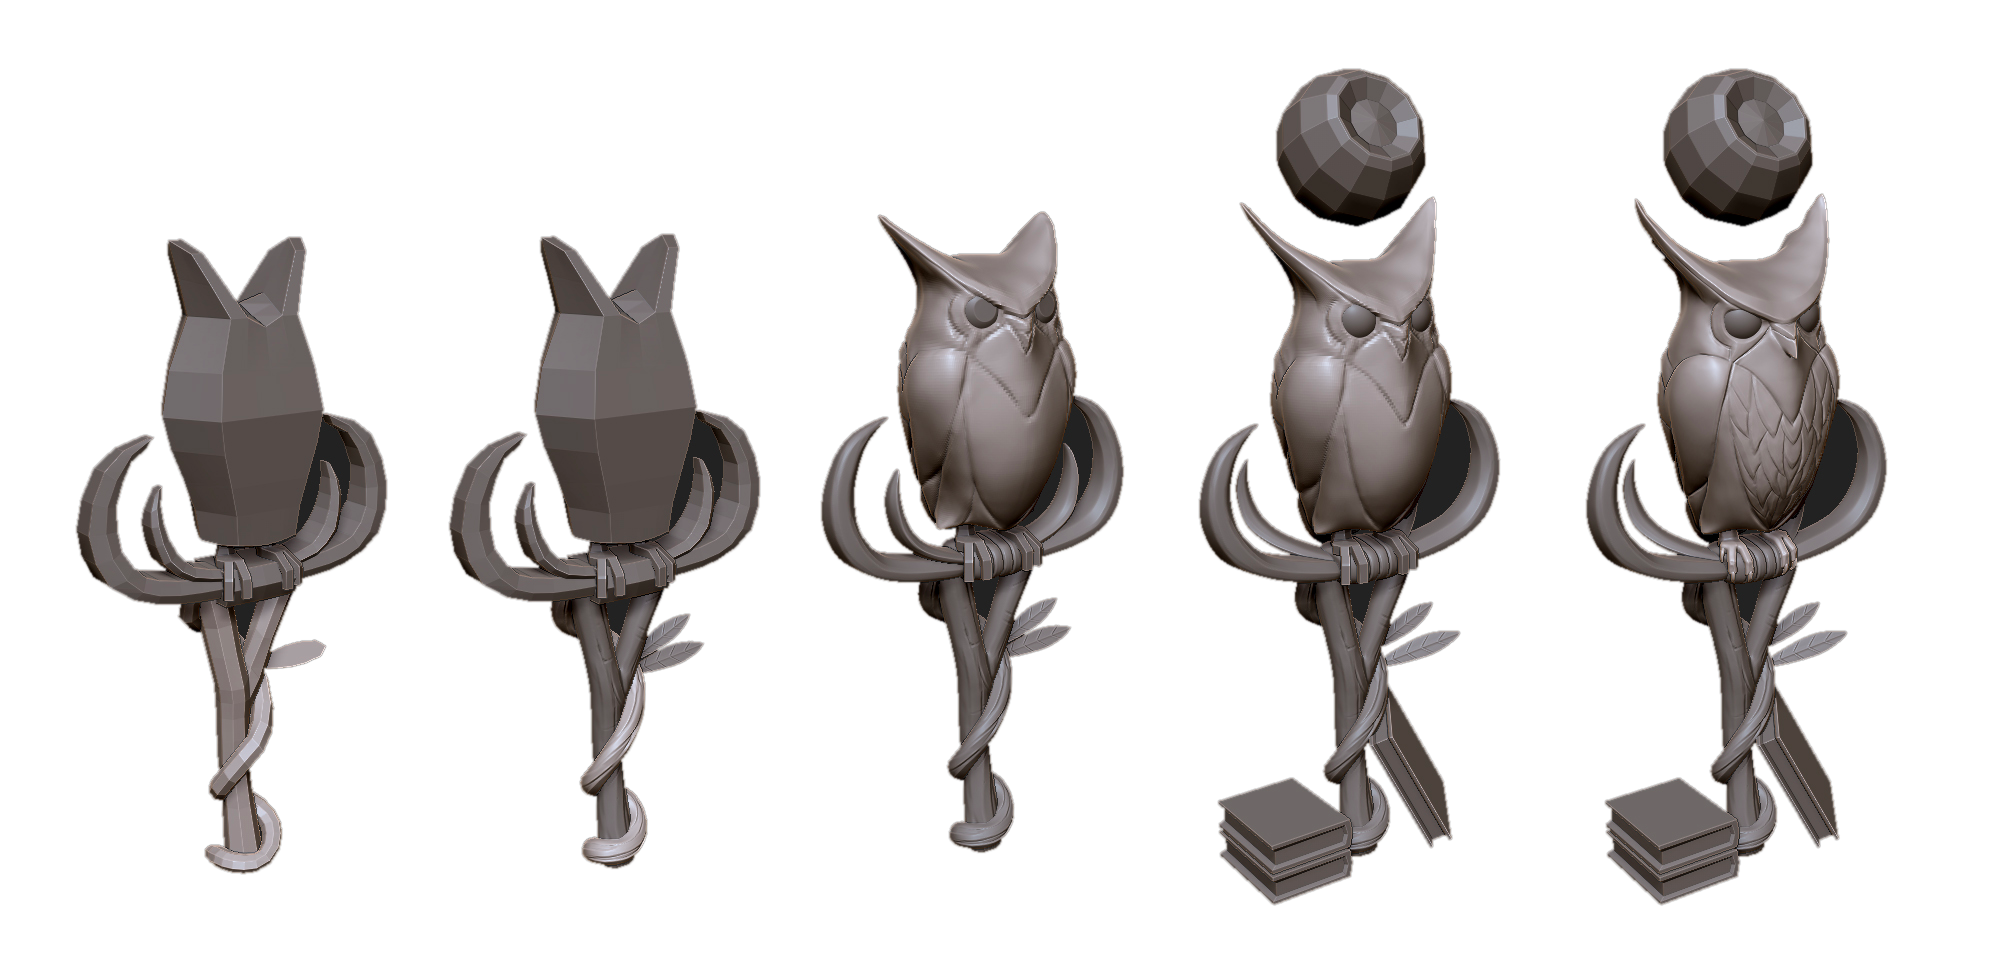
3D models that you see in computer games and films are typically comprised of gemotry, also known as a mesh, and a texture. Without a texture the gemotry of a model looks unfinished, much like how a model in the real world would be without paint. The following example shows how the mesh of the "Feather Sentinel" item is constructed in Valve's Dota 2.
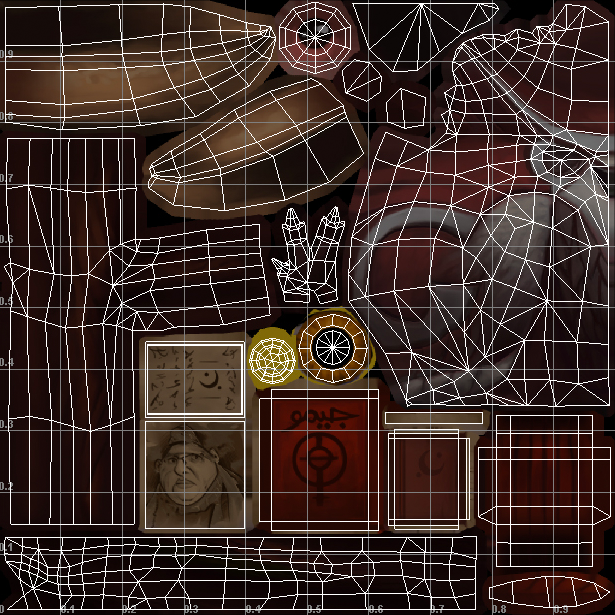
Once the mesh has been created the model is unwrapped in order to apply a texture. The best way to describe unwrapping is if you take a cube and unfold each edge of it laying it flat on the ground. This is done to create something called a UV map. The UV map will distinguish each area of the model for when a 2D texture is placed on it. In the example below the UV map is applied to the mesh above which forms the finished textured model. The complexity varies significantly depending on the project, and in some cases there may be multiple meshes, textures, UV maps and so on.
Gathering the Samples
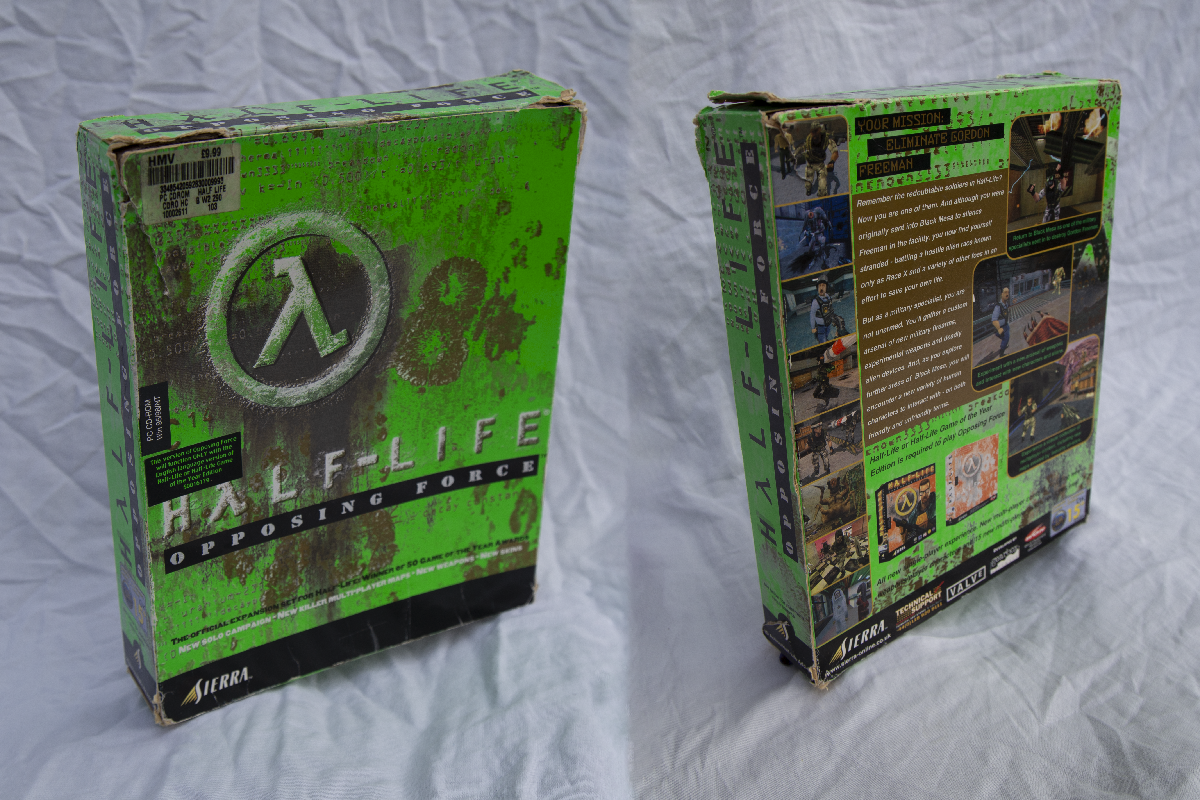
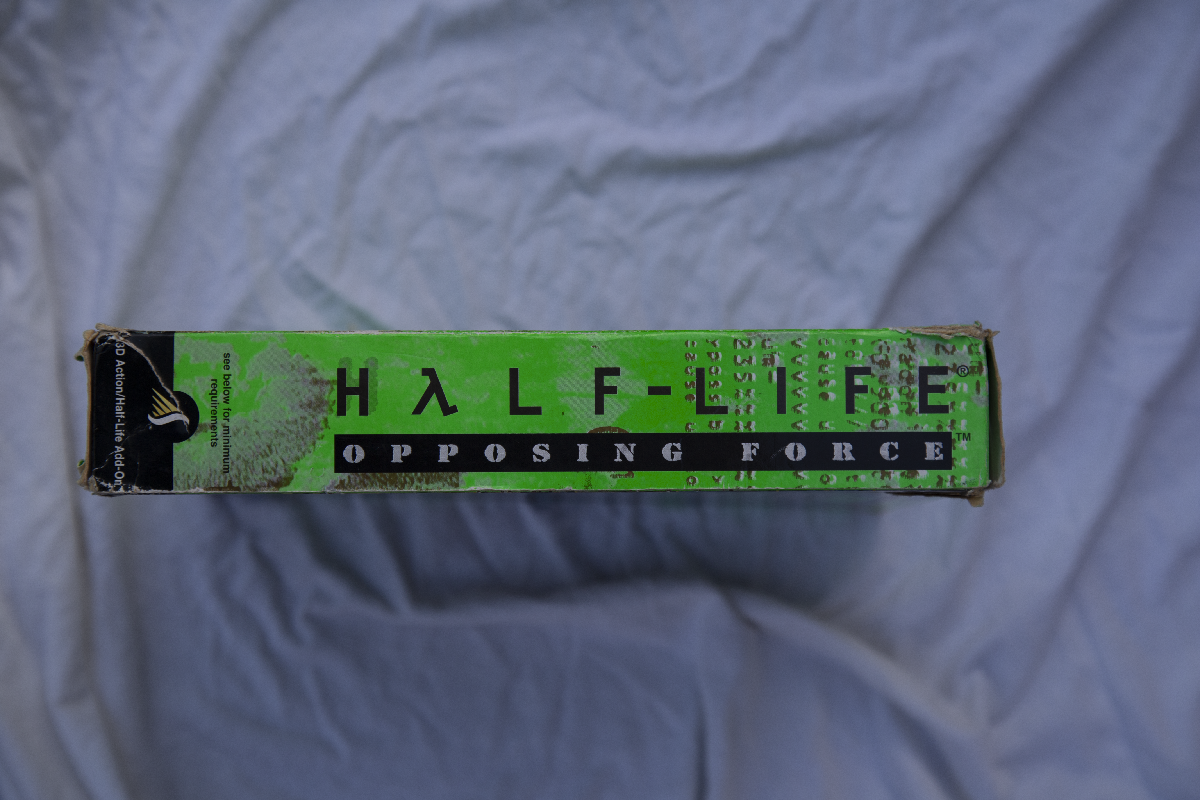
Fortunately for this project computer game boxes are pretty straightforward, they are more or less an enlongated rectangle, which is great for someone with little to no 3D modeling experience. I began by taking photographs of the boxes at as flat of an angle as possible with good lighting. The goal here is to capture each angle of the box so it can be reconstructed later. Ideally the photographs should look something similar to the one below. The example below is taken using a Digital SLR camera but so long as your lighting is good you can use a phone camera and you'll still get great results.
With the photographs taken I used image editing software to remove the background from them. You can do this a number of ways, my preferred method however is with Adobe Photoshop. I use the pen tool to trace around the corners, and using the selection tool I create an alpha channel which makes the background transparent. If you'd like to use the same technique there's a ton of videos available on YouTube that show you how to do it.
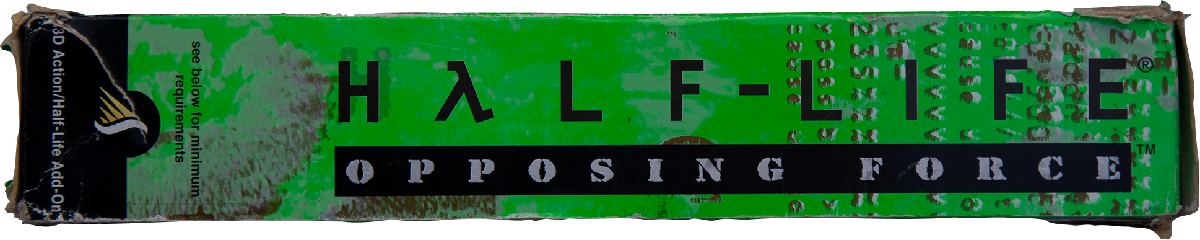
With all of the background removed the image above looks something similar to the following. Older boxes like this one tend to have some wear and tear which means you'll need to use your discrtion when cutting out the background. As I'm aiming for nothing more than a rectangle mesh for simplicity purposes I had to remove a few bits that stick out. If you wanted to go the extra mile you could make the parts that stick out part of the mesh and texture them appropriately.
Importing an Existing Model
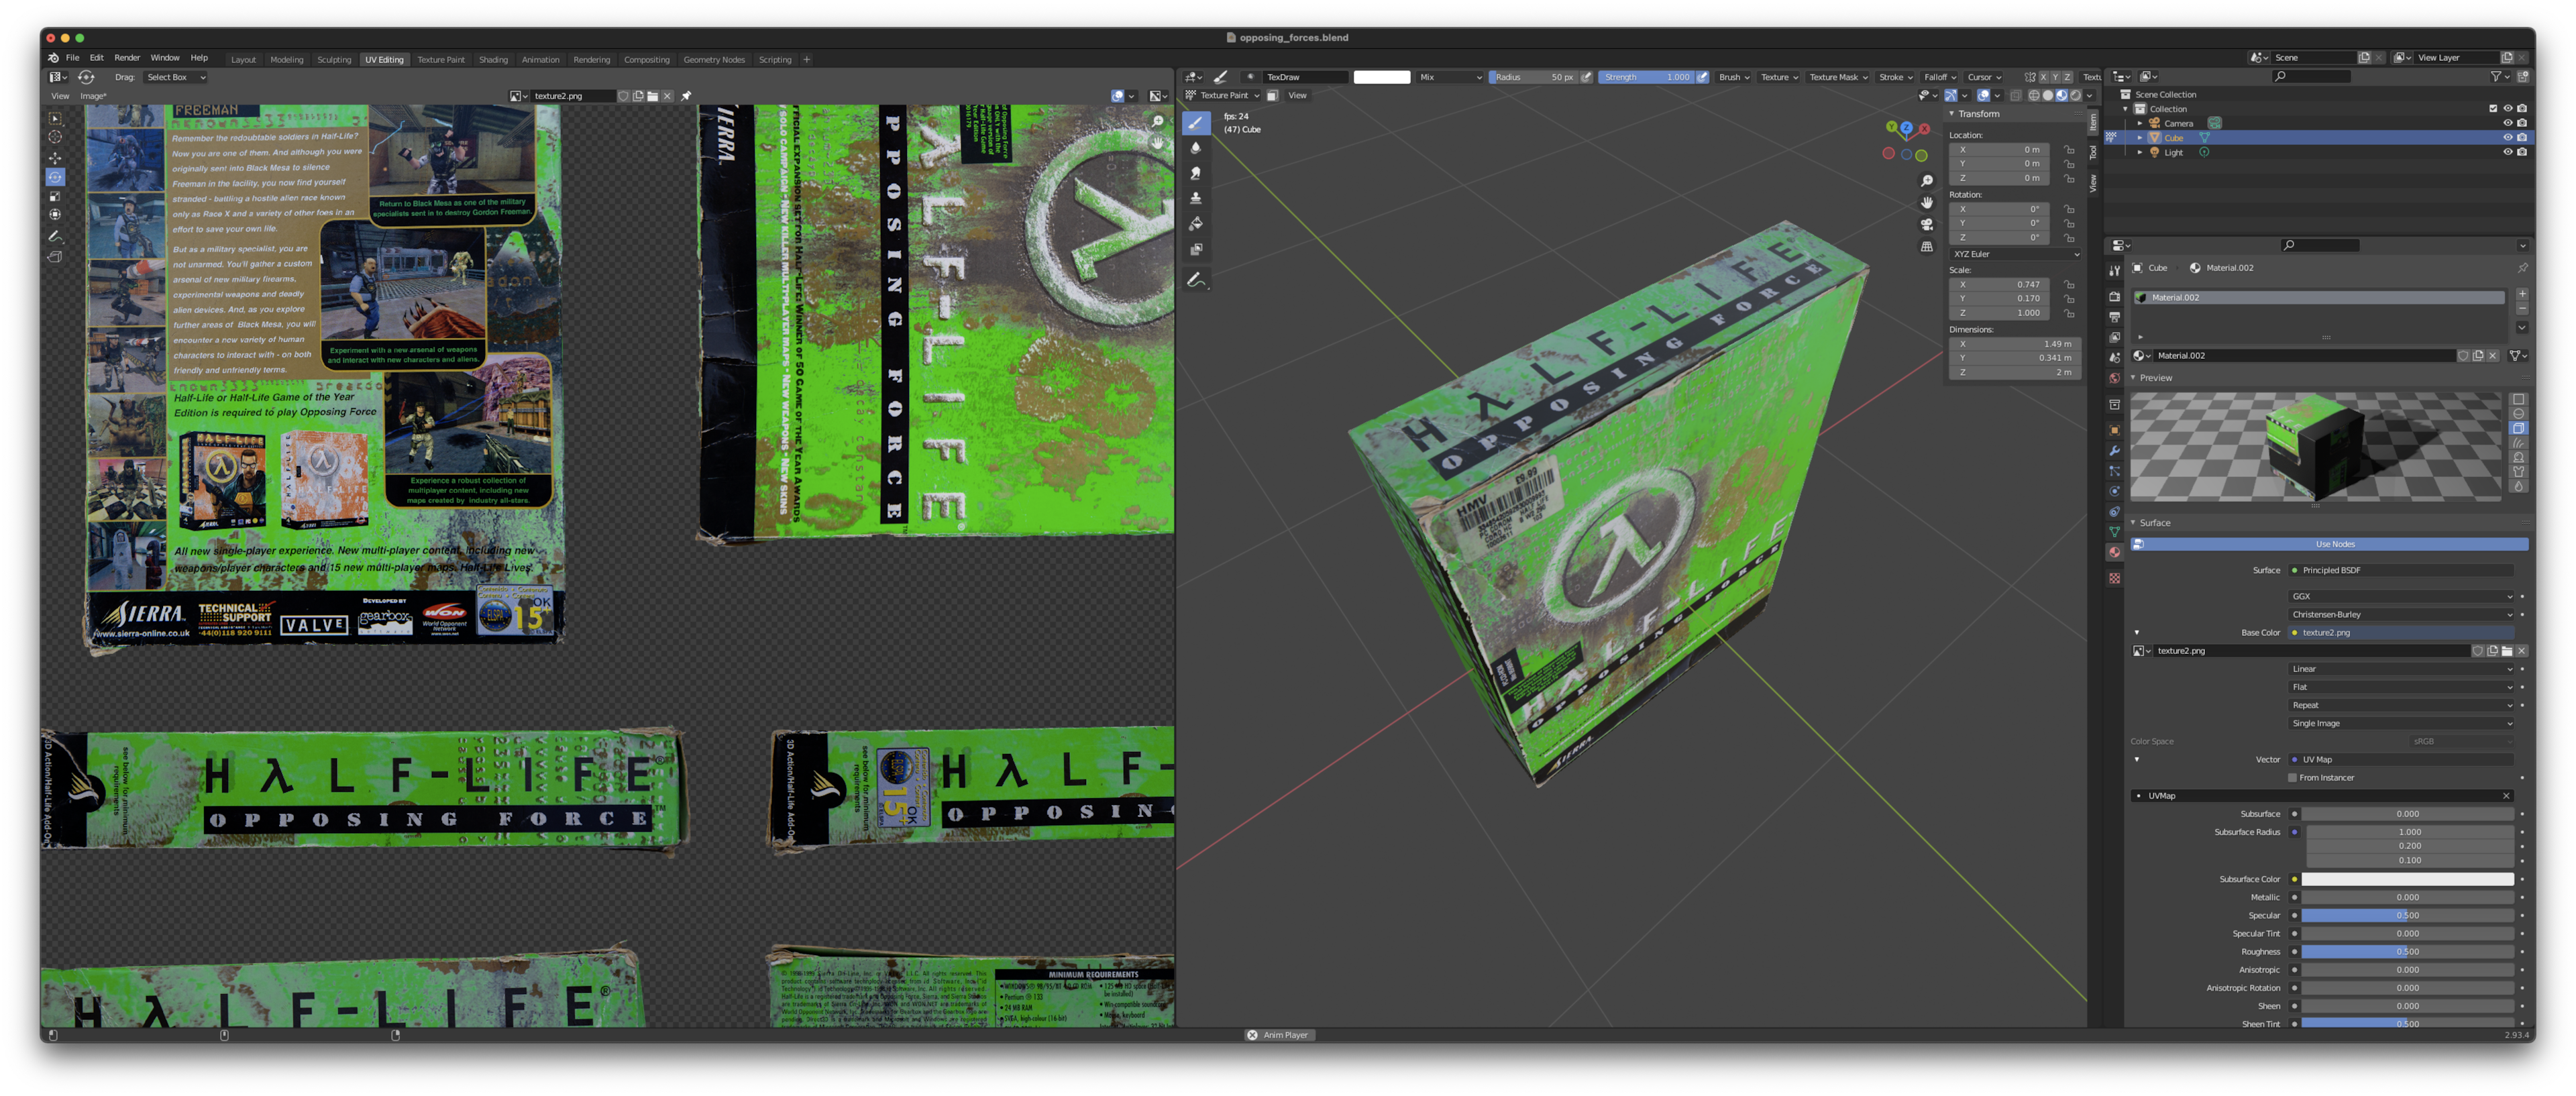
With all of the texture surfaces created it's now time to create to actually create the model. For my first box I decided to use Blender, which is a commonly used piece of 3D modeling software. I built out the structure of the box by skewing the default cube into a shape that resembles the original size.
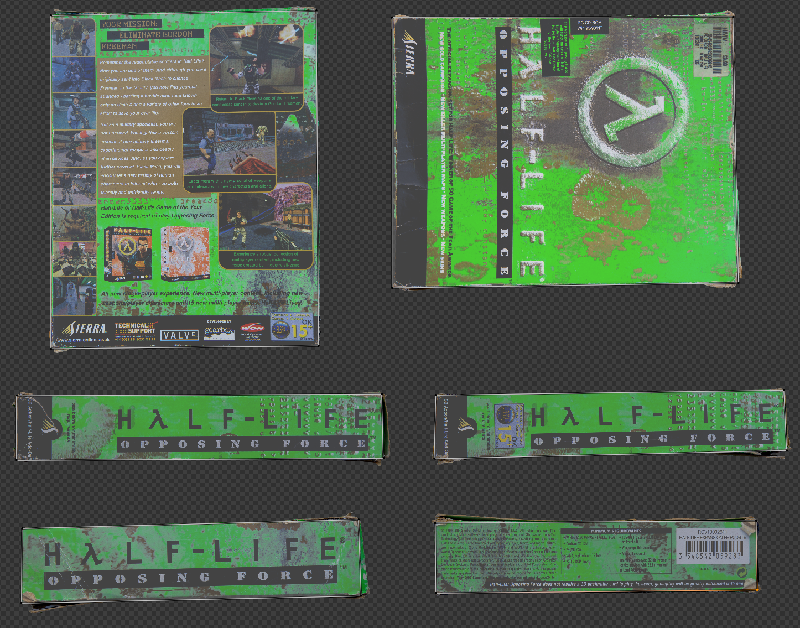
I then unwrapped the mesh so I could begin applying the photographs. In order to apply the correct photograph to the desired side of the box we need to create a UV map which defines the parameters of where each face of the model should recieve its texture from. To do this I took all of the cut out photographs of the box and combined them into a single image within Adobe Photoshop. I then adjusted the UV placement in Blender so each area is covered the corresponding side of the box on the mesh.
Once I was happy with how the model looks in Blender I exported it as a .gltf file. Using Three.js you can use the GLTFLoader constructor to load the model file directly. I like this approach because you can
recycle the model to use outside of the browser if the need arises by simply exporting it as a different format. Bare in mind depending on the complexity of your model the file size may be
much larger than you expect. As a result it may not always be the most optimized way of doing things and the approach in the following section may be more appropriate.
const scene = new THREE.Scene()

const light = new THREE.AmbientLight(0x20202a, 15, 0)
light.position.set(30, 0, 30)
scene.add(light)

// Model Loader
const loader = new THREE.GLTFLoader()
loader.load(
  '/images/blog/2021-11-26-rendering-3d-models-in-the-browser/opposing_forces.glb',
  (data) => {
    const object = data.scene
    object.position.set(0, 0, 0)
    scene.add(object)
  },
)
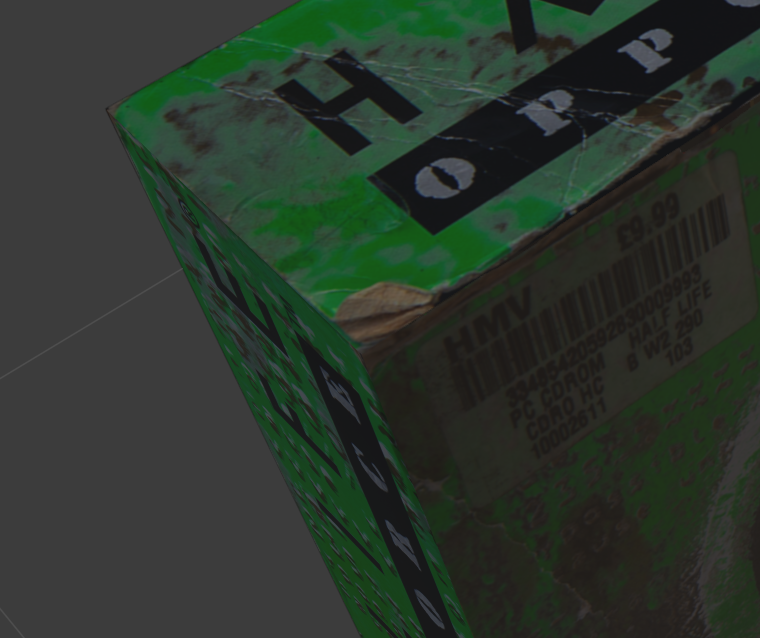
Using the above code I was able to get my box rendering in the browser. The lighting can make a lot of difference and I'd encourage you to mess around with the parameters to get the best results.
I was really happy with the results from this as the wear and tear from the box was preseved, making it feel more 3D despite it being just a flat texture. Being able to fine tune the UV by hand really makes a difference.
Building the Mesh with Three.js
For my second box I decided to go with a more direct approach and instead build the mesh directly using Three.js. For this you can utilize the BoxGeometry constructor, passing in different widths and heights to get the box the correct shape. Afterwards we can apply a basic material for each surface with MeshBasicMaterial. With this appraoch we can apply each cut out photograph as their own individual texture instead of combining them all and creating a UV map.
const boxWidth = 1.3
const boxHeight = 1.2
const boxDepth = 0.3
const scene = new THREE.Scene()
const geometry = new THREE.BoxGeometry(boxWidth, boxHeight, boxDepth)

const cubes = []
const loadManager = new THREE.LoadingManager()
const loader = new THREE.TextureLoader(loadManager)

const materials = [
  new THREE.MeshBasicMaterial({
    map: loader.load('https://jives.dev/lab/textures/wotlk/right.png'),
  }),
  new THREE.MeshBasicMaterial({
    map: loader.load('https://jives.dev/lab/textures/wotlk/left.png'),
  }),
  new THREE.MeshBasicMaterial({
    map: loader.load('https://jives.dev/lab/textures/wotlk/top.png'),
  }),
  new THREE.MeshBasicMaterial({
    map: loader.load('https://jives.dev/lab/textures/wotlk/bottom.png'),
  }),
  new THREE.MeshBasicMaterial({
    map: loader.load('https://jives.dev/lab/textures/wotlk/front.png'),
  }),
  new THREE.MeshBasicMaterial({
    map: loader.load('https://jives.dev/lab/textures/wotlk/back.png'),
  }),
]

loadManager.onLoad = () => {
  const cube = new THREE.Mesh(geometry, materials)
  scene.add(cube)
  cubes.push(cube)
}
Using this method I was able to come up with a pretty decent looking Wrath of the Lich King box!
I like this approach a lot as it's done purely using JavaScript and doesn't require you to have any prior understanding of 3D modeling software. You are able to make similar adjustmnets with Three.js as you can with 3D modeling software although the process is more manual as it's done purely with code. When it comes to creating vastly more complex models you'll probably be better off using purpose built software.
Closing Thoughts
I had a lot of fun working on this project, and I'm still putting the finishing touches on my "digital shelf" where I'll be storing the 3D versions of my old computer games. Special thank you to my brother for all of the help with taking photographs for this article.
I hope you all have a happy holidays and a safe new year. Onwards to 2022! 🎉
In loving memory of my brother, John Ives. 🖤