Google Assistant Action for the DC Metro

Overview
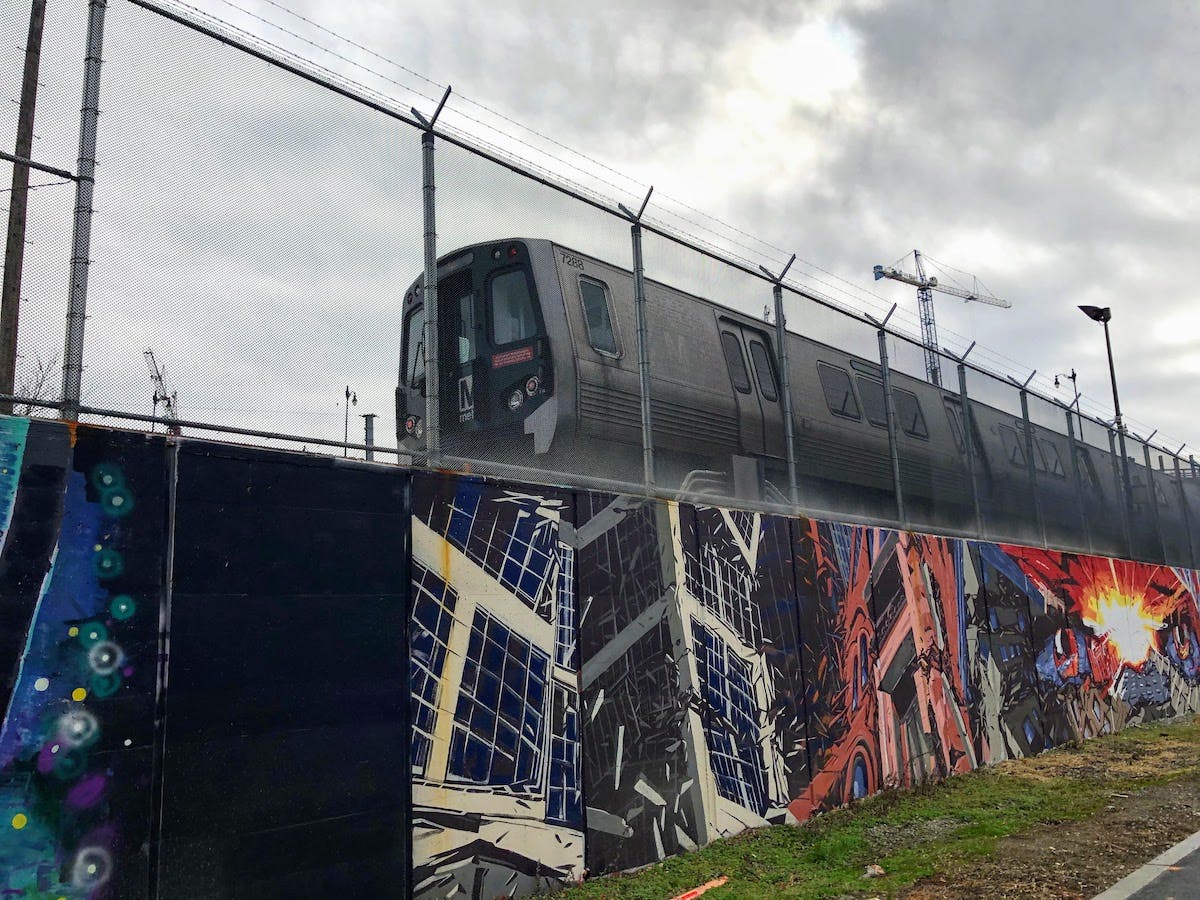
About 6 months ago I decided to relocate from Austin Texas to the capital of the United States, Washington D.C. Since moving I've decided to become more active, walking almost everywhere, and for those places that are too far, using public transport instead. There's a great train and bus system in the city of Washington, and you can get almost anywhere with it. Since moving I've also been getting into home automation, figuring out ways I can make my place more connected with Google Assistant has been something I've enjoyed doing, so I thought as a developer I can combine these two interests and create a project.
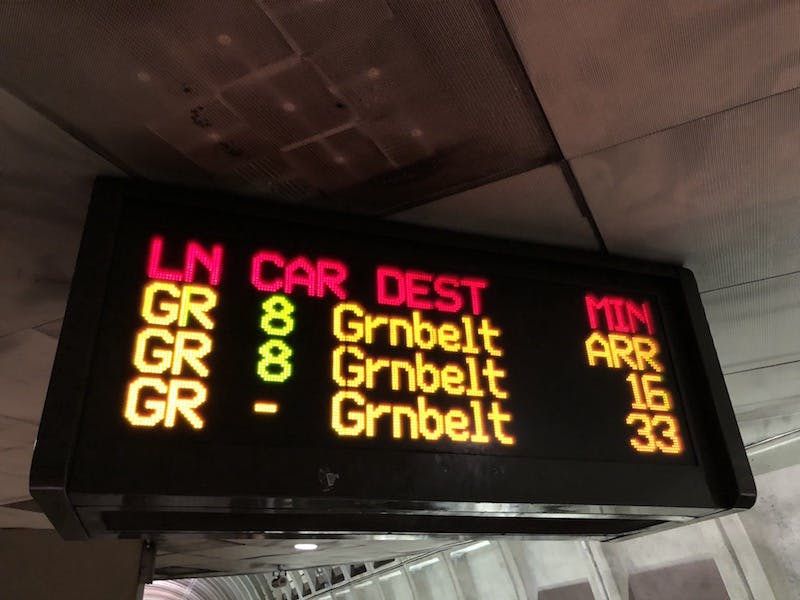
The goal I set for myself was to create a way I can query my Google Assistant devices for the rail and bus timetables on the DC transit system. Typically you can find these timetables on station platforms and at select bus stops, and the goal was to make the data available anywhere you can you use Google Assistant.
Understanding the Tools
Google Assistant actions are typically sectioned into three different parts. The first being the Actions on Google console, this is where the core of the action lives, and is how you can test the action post-deployment.
The next area is DialogFlow, which is Google's machine learning platform for speech recognition. This is where we'll setup our phrases and context so we can ensure that we're delivering the correct information that the user requests. If you want to get started and write something simple such as a questionaire or a trivia action you can create this without needing to write any code.
The final part is the fulfilment, I'll be using a webhook that DialogFlow will reach out to in order to execute the code to display the Metro timetables to the device.
Configuring DialogFlow
DialogFlow needs to be configured before we can begin building the fulfillment code. Within DialogFlow the primary starting point for most actions are called Intents. If a user says Ok Google, Ask DC Metro for the train times at Farragut and Ok Google, Ask DC Metro for train commands then it needs to be able to figure out which is which so we can present the right information to the user.
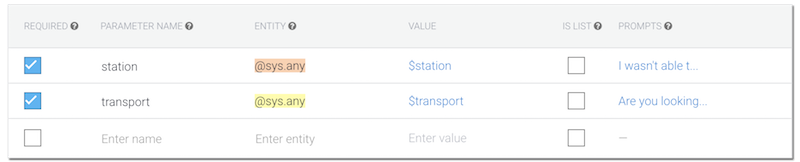
Within the DiagFlow control panel add a new intent and select the "Enable webhook call for this intent" option near the bottom. After that navigate down to the Action and Paramters section. Here we'll configure two properties which will allow DiagFlow to pull out certain parts of the phrases that the user says to the assistant. For the metro_timetable intent we need to know what mode of transport the user wants to hear the times for, and the station name or stop id. Without both of these pieces of data we can't make the required API calls to WMATA, so these should be marked as required. The entity type should be whatever is most applicable to your action, for my case @sys.any worked the best.
With the paramters setup it should look something like the following.
We're now ready to start providing DialogFlow with some training phrase to help it understand the context of the intent. These phrases should be examples of how a user can invoke your action. For instnace I want Train times for Smithsonian to trigger the intent so I added it as a training phrase. Once I've added the phrase I highlighted Train and Smithsonian and pointed them to the paramters I just created. If I try it out in the intent debugger the paramters names should be correctly populated. Over time DialogFlow will start to realize that Train and Smithsonian are intechangable, and it will pass through any word it believes can fit in those slots to the fulfillment.
The intent debugger generates diagnostic information. You can see that the paramters key holds an object with the data we need to make the API calls.
{
  "responseId": "15f7fc8f-9bcf-40ec-951c-e3ca5211111",
  "queryResult": {
    "queryText": "Metro times at Farragut North",
    "parameters": {
      "station": "Farragut North",
      "transport": "Metro"
    },
    "allRequiredParamsPresent": true,
    "fulfillmentText": "I wasn't able to understand your request, please try again.",
    "fulfillmentMessages": [
      {
        "text": {
          "text": [
            "I wasn't able to understand your request, please try again."
          ]
        }
      }
    ],
    "webhookPayload": {
      "google": {
        "richResponse": {
          "items": [
            {
              "simpleResponse": {
                "textToSpeech": "I wasn't able to understand your request, please try again."
              }
            }
          ]
        },
        "expectUserResponse": true
      }
    },
    "intent": {
      "name": "projects/dc-metro-b8719/agent/intents/f2dcdbba-550a-4092-89b1-c1f782111",
      "displayName": "metro_timetable"
    },
    "intentDetectionConfidence": 1,
    "diagnosticInfo": {
      "webhook_latency_ms": 46
    },
    "languageCode": "en"
  },
  "webhookStatus": {
    "message": "Webhook execution successful"
  }
}
Fulfilment
My favorite part of this project is writing the fulfilment code. This is the code that will run whenever our function is invoked by Google Assistant. Google provides a great library for this called actions-on-google which I'll be using in my examples. I'll also be using the firebase-functions library as I'll eventually be deploying my code to Firebase.
To start of I created a hook for the metro_timetable intent and destructed transport and station in the second arguement, this is how we can pull data from the DiagFlow paramters object.
import * as functions from 'firebase-functions'
import { dialogflow } from 'actions-on-google'

const app = dialogflow({ debug: true })

app.intent(
  'metro_timetable',
  async (
    conv: any,
    { transport, station }: { transport: string, station: string },
  ) => {
    // This is where we can add our code that gets executed when the intent is triggered...
  },
)

exports.dcMetro = functions.https.onRequest(app)
The next step is creating the helper functions which will get us all of the data we want to display to the user when our intent is triggered. As my goal is to display data about the Washington DC Metro I need to make an outbound request to the WMATA API, however there's a problem. At the time of writing this if you sign up for a free Firebase Functions account you're only able to make API requests to other Google services, so in order to continue with this I needed to upgrade to the Firebase Blaze pay as you go plan. The good news is that if you publish your action Google provides some incentives for doing so including credits.
With that taken care of I can begin to write some code that will fetch some data about the users request. I've commented the examples below to give you a sense of what's going on here, when the function is called I'm passing in the DialogFlow station paramter to this function which will grab the latest train departures and return the object.
import * as functions from 'firebase-functions'
import fetch from 'node-fetch'

export const rootUrl = 'https://api.wmata.com'
export const wmataApiKey = functions.config().metro.apikey

export const fetchTrainTimetable = async (station: string): Promise<object> => {
  try {
    // Gets a list of all stations from the WMATA API.
    const stationResponse = await fetch(
      `${rootUrl}/Rail.svc/json/jStations?api_key=${wmataApiKey}`,
      { method: 'GET' },
    )
    const stations = await stationResponse.json()

    /* To get more details about a station we require the station code.
      In order to get this information we filter down the first result
      for the station that matches the users input, and then grab the code. */
    const stationCode = stations.Stations.filter((item) => {
      return item.Name === station
    })[0].Code

    /* Runs the code through the prediction endpoint to get the updated
      train timetable for that station. */
    const predictionResponse = await fetch(
      `${rootUrl}/StationPrediction.svc/json/GetPrediction/${stationCode}?api_key=${wmataApiKey}`,
      { method: 'GET' },
    )
    const predictionObj = await predictionResponse.json()

    /* Before we return the data we filter out any timetable
      entries that have a line name of 'None' or 'No'.
      This is how the WMATA API indicates a non-passenger train
      is passing through the station. */
    return await predictionObj.Trains.filter(
      (item) => item.Line !== 'None' || item.Line !== 'No',
    )
  } catch (error) {
    return []
  }
}
With the function returning an array of station predictions we are now ready to surface the data to the action. In the intent function we'll send back a response to the user indicating the next train that's arriving at the chosen stop using the conv methods. There's two main ones that I'll be making use of here, conv.ask() and conv.close(). Whenever you use conv.ask() you'll leave the Google Assistant microphone on so the user can provide followup dialog, for instance you might want to say to the user "Do you want to look at times for another station?" which will either prompt them to say no or to make another request. With conv.close it will automatically end the dialog with the user once you give the user the information. If you incorrectly use conv.ask() without prompting the user for more dialog it's likely that Google will reject your action when you submit it for production deployment.
app.intent(
  'metro_timetable',
  async (
    conv: any,
    {transport, station}: {transport: string, station: string}
  ) => {
      // Fetches the train timetables...
      const timetable: any = await fetchTrainTimetable(station);

      // If there's no trains we let the user know and ask a followup question.
      if (!timetable.length) {
        conv.ask(
          'There are no trains currently scheduled to stop at this station. Would you like to try another station?'
        );
      } else {

        // If we have stations we send the data back to the user and close the conversation flow.
        conv.close(
          new SimpleResponse({
            speech: `The next train arriving at ${station} is a ${
              lineNamesEnum[timetable[0].Line]
            } line train and has a final calling point at ${
              timetable[0].Destination
            }. ${
              timetable[0].Min === 'ARR'
                ? `It's arriving now.`
                : timetable[0].Min === 'BRD'
                ? `It's boarding now.`
                : `It arrives in ${timetable[0].Min} minutes.`
            }`,
            text: `The next train arriving at ${station} has a final calling point at ${
              timetable[0].Destination
            }. ${
              timetable[0].Min === 'ARR'
                ? `It's arriving now.`
                : timetable[0].Min === 'BRD'
                ? `It's boarding now.`
                : `It arrives in ${timetable[0].Min} minutes.`
            }`,
          })
        );
})
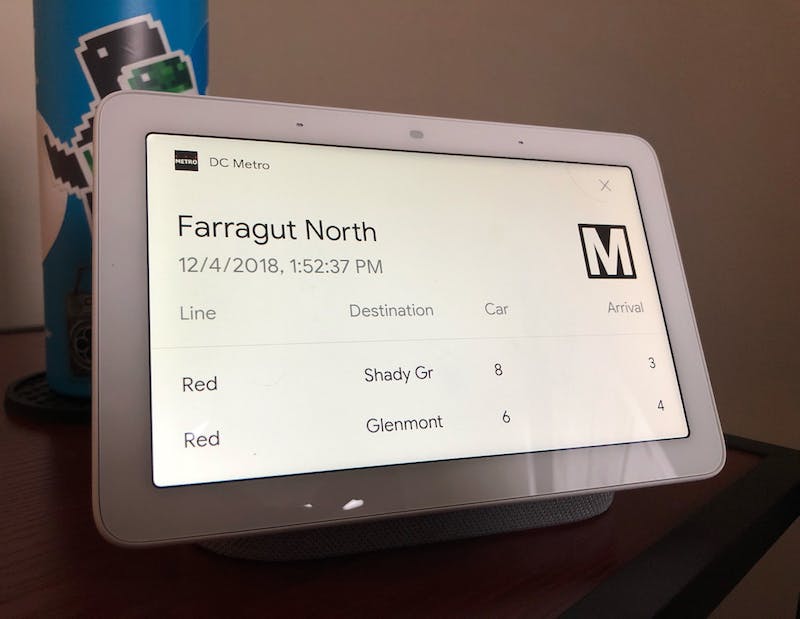
Not all Google Assistant devices have screen, but for those that do I want to display all of the information I have in a table, which is convinient as the actions-on-google library offers a way to display a table of data. There's a couple of things to keep in mind, your table rows need to be of equal lengths to the table headers, and the cell contents cannot contain an integer or an empty string, these are a couple of things that I lost a ton of time to debugging because the Google documentation doesn't state it, and the API I'm using sometimes returns empty strings for data that isn't available.
import * as functions from 'firebase-functions'
import {
  dialogflow,
  Image,
  Table,
  Button,
  SimpleResponse,
} from 'actions-on-google'
import {
  lineNamesEnum,
  serviceCodesEnum,
  convertCode,
} from '/images/blog/2018-12-05-dc-metro-google-assistant-action/util'
import {
  fetchTrainTimetable,
  fetchBusTimetable,
} from '/images/blog/2018-12-05-dc-metro-google-assistant-action/wmata'

const app = dialogflow({ debug: true })

app.intent(
  'metro_timetable',
  async (
    conv: any,
    { transport, station }: { transport: string, station: string },
  ) => {
    const timetable: any = await fetchTrainTimetable(station)

    /* Generates the neccersary table cells for display devices.
        Falls back to 'TBD' if the data isn't present in the API return. */
    const timetableCells = timetable.map((item) => {
      return {
        cells: [
          lineNamesEnum[item.Line] || 'TBD',
          item.Destination || 'TDB',
          item.Car || 'TBD',
          convertCode(item.Min || 'TBD', serviceCodesEnum),
        ],
      }
    })

    //...

    /* As this data can only be displayed on a screen, we check if the user actually has one
        before the payload is sent. */
    if (conv.surface.capabilities.has('actions.capability.SCREEN_OUTPUT')) {
      conv.close(
        new Table({
          title: station,
          subtitle: new Date().toLocaleString(),
          image: new Image({
            url: 'https://upload.wikimedia.org/wikipedia/commons/thumb/0/0a/WMATA_Metro_Logo_small.svg/1024px-WMATA_Metro_Logo_small.svg.png',
            alt: 'DC Metro Logo',
          }),
          columns: [
            {
              header: 'Line',
              align: 'LEADING',
            },
            {
              header: 'Destination',
              align: 'CENTER',
            },
            {
              header: 'Car',
            },
            {
              header: 'Arrival',
              align: 'TRAILING',
            },
          ],
          rows: timetableCells,
          buttons: new Button({
            title: 'Issues and Feedback',
            url: 'https://github.com/JamesIves/dc-metro-google-action/issues',
          }),
        }),
      )
    }
  },
)
In theory once our intent fires we should be able to get an audio prompt about the next arriving train, and a table of data with all of the arriving trains on a device with a screen.
Simulation
When you're ready you can deploy the action to Firebase and copy the URL it generates. Within the fulfillment area of Dialogflow you'll see a Webhook URL field, add the path there and any additional parameters it requires, and then enable it. With this configured you'll be able to use the Google Assistant simulator which you'll find on the Actions on Google console. This is a chance for you to test your action before it gets deployed to the masses. The action needs to be rigorously tested, try giving it some commands that you wouldn't expect, and try your best to break it. I found that writing an action required a lot of code built around error handling, mostly because if it errors once the entire action will stop functioning which isn't ideal. I had to test many edge cases with the API I was working with as the data isn't always totally consistent and occasionally it would cause the DialogFlow parser to throw an error.
If all your testing is successful you'll be ready to submit the action for production. If Google finds an issue they'll send you an email and you'll need to fix the problem they find before you submit it again.
Closing Thoughts
If you'd like to try out my DC Metro application you can invoke it on any Google Assistant powered device or application. If you're more interested in the code it's open source and available on Github.