Building a Robot with NodeJS
Overview
I recently spent the day at Houston University for Node Bots day. Throughout the course of the day I learned all about building and controlling a robot with the power of NodeJS, which is something I didn't even know was possible until recently.
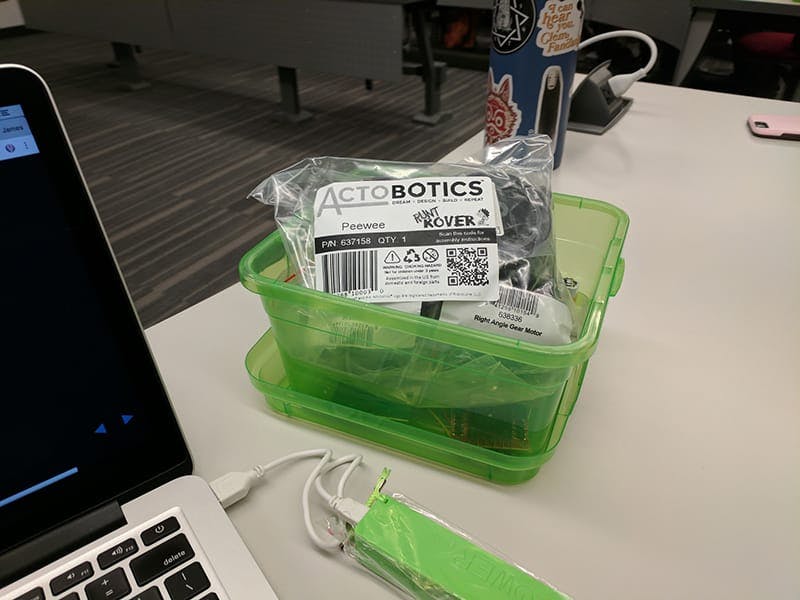
We were provided with a starter kit that had all of the components needed to start building. It included a Tessel 2, an ActoBotics Peewee, battery packs, and a set of miscellaneous components for experimenting with. The first half of the day was spent placing components on a proto-board and writing some code to make them work.
Experimenting with the Tessel
The Tessel IO and Johnny Five libraries are what we used to allow NodeJS to interface with the Tessel 2. With these available all you need to do is import the libraries and then call the board constructor.
const Tessel = require('tessel-io'),
  five = require('johnny-five')

const board = new five.Board({
  io: new Tessel(),
})
For an LED all you need to do is define the pin placement when calling the constructor, and then tell it to blink when the board is considered ready using board.on('ready').
board.on('ready', () => {
  const led = new five.Led('A0')
  led.blink(2500)
})
You can even interface with physical buttons, for exmaple you can make a button turn on an LED when it's pressed.
board.on('ready', () => {
  const led = new five.Led('A5')
  const button = new five.Button('A2')

  button.on('press', () => {
    led.on()
  })

  button.on('release', () => {
    led.off()
  })
})
Building the Robot
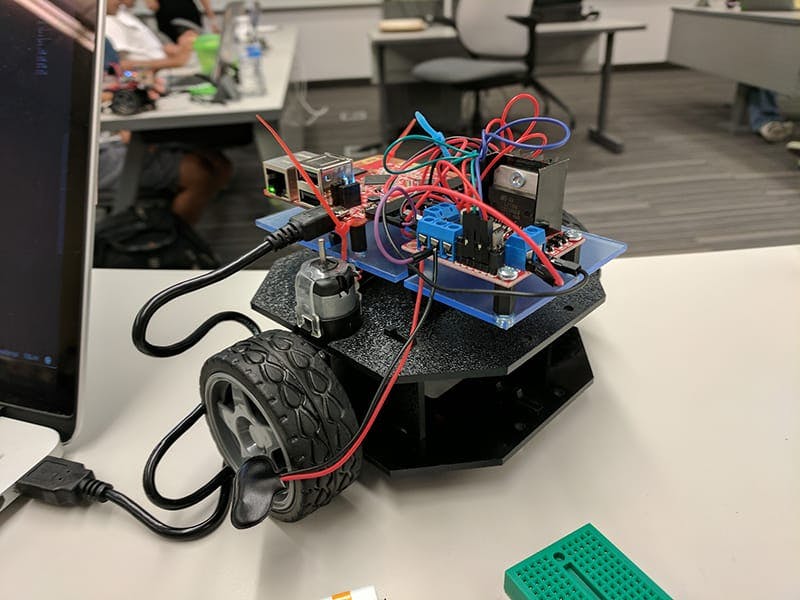
Once we were done experimenting we moved on to building the robot. We watched a video on how to assemble the chasis and then got straight to work. The robot at this point has been dubbed "Montezooma".
Once the physical assembly was completed I began writing some code with the help of some examples provided by the event organizers. The Tessel 2 transmits a wireless access point you can connect and configure, so the goal was to create a simple web app that would allow the robot to be controlled when connected to it. Using Express and Socket IO made this quite simple, all I needed to do was emit some events from my Front-End to fire a function in my NodeJS app.
I created some HTML buttons for each direction and then hooked up some JavaScript event listeners. Within those event listeners I used the Socket IO emit method.
const forward = document.getElementById('forward'),
  reverse = document.getElementById('reverse'),
  socket = io()

forward.addEventListener('mousedown', () => {
  socket.emit('moveForward')
})

forward.addEventListener('mouseup', () => {
  socket.emit('stopMotors')
})

reverse.addEventListener('mousedown', () => {
  socket.emit('moveBack')
})

reverse.addEventListener('mouseup', () => {
  socket.emit('stopMotors')
})
Within my NodeJS code I imported Johnny Five, Tessel IO, and Socket IO. I then setup my board and some Express routes. Because this robot uses DC motors it was necessary to call a constructor that would create two motors so we could control each of them individually.
const
  express = require('express'),
  app = express(),
  path = require('path'),
  port = 3000,
  server = app.listen(port),
  socketIO = require('socket.io').listen(server),
  five = require("johnny-five"),
  Tessel = require("tessel-io");

// Setup new board
const board = new five.Board({
  io: new Tessel()
})

// Express Routes
app.use('/static', express.static(path.join(__dirname, 'public')))

app.get('/', (req, res) => {
  res.sendFile(path.join(__dirname + '/public/index.html'));
})

board.on("ready", () => {
  // Motor Left Setup
  const motorLeft = new five.Motor({
    pins: {
      dir: 'A6'
      pwm: 'A5'
    },
    invertPWM: true
  })

  // Motor Right Setup
  const motorRight = new five.Motor({
    pins: {
      dir: 'B6'
      pwm: 'B5'
    },
    invertPWM: true
  });
});
Within board.on('ready') I added some control sockets. These look for named events to be emitted, and then fire a function in their second argument. For example when the Front-End emits moveForward the moveForward function gets fired within NodeJS.
// Control Sockets
socketIO.on('connection', (socket) => {
  socket.on('turnRight', turnRight)
  socket.on('turnLeft', turnLeft)
  socket.on('moveForward', moveForward)
  socket.on('moveBack', moveBack)
  socket.on('stopMotors', stopMotors)
})
When the mouseup event occurs another event gets emitted called stopMotors, which stops the motors, naturally.
function moveForward() {
  let speed = 150

  motorLeft.reverse(speed)
  motorRight.forward(speed)
}

function stopMotors() {
  motorLeft.stop()
  motorRight.stop()
}
Speed Controls
I wanted my robot to be able to switch speeds with the use of a slider. For this I created a settings module, the goal of this was to hold on to the current speed and return it if settings.getSpeed() is called, or update it if settings.setSpeed(value) is called.
let settings = {
  speed: 100,
}

module.exports = {
  setSpeed: (value) => {
    settings.speed = value
  },
  getSpeed: () => settings.speed,
}
Within my Front-End code I setup an event listener that watched for changes to the slider, and then emitted a Socket event with the value of it.
const speedRange = document.getElementById('speed-range'),
  socket = io()

// Adjusts the current speed of the robot.
speedRange.onchange = () => {
  let value = speedRange.value

  socket.emit('changeSpeed', value)
}
I then made another listener for the event and passed the speed value into it. I call upon settings.setSpeed() to update the value passed from the Front-End.
const settings = require('/images/blog/2017-08-04-building-a-robot-with-nodejs/settings')

socketIO.on('connection', (socket) => {
  // Modifies the motor speed
  socket.on('changeSpeed', (speed) => {
    settings.setSpeed(speed)
  })
})
I can then update my robot movement functions to grab the speed value from the settings before telling the motors to do anything.
function moveBack() {
  // Moves the motors backwards
  let speed = settings.getSpeed()

  motorLeft.forward(speed)
  motorRight.reverse(speed)
}
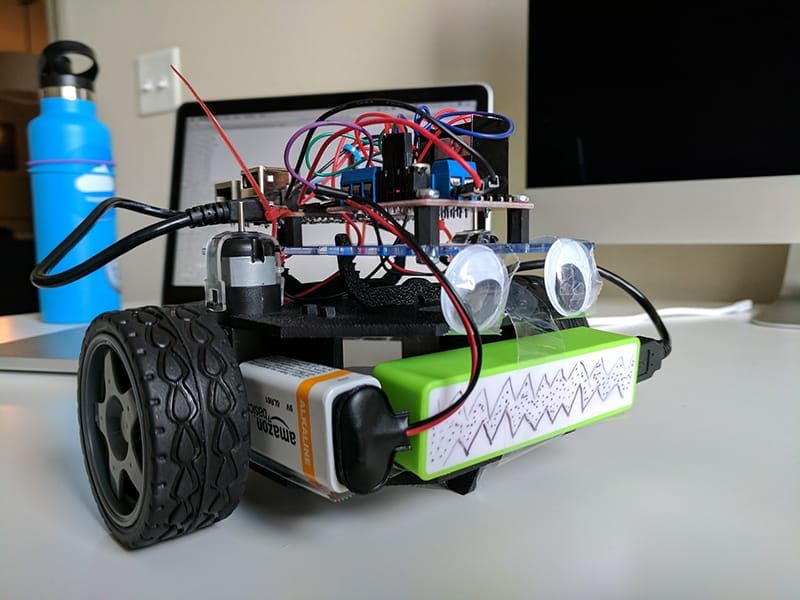
Montezooma Lives!
We had a great day and learned a quite a lot about NodeJS robotics, we're already talking about our next build. Special thanks to the NodeJS Houston community for putting on such an awesome event.
If you'd like to view the code we used to power the robot you can check it out on GitHub.